Sunday, April 21, 2013

Beef and Bean Chili

So my family LOVES chili and I have come up with this recipe that is fairly simple to make and has some versatile options. So here you go!

Debbie's Beef and Bean Chili
1-2 Tbsp Canola Oil
1 large onion, chopped
6 cloves of garlic, minced
1 jalapeƱo, minced
2 lbs ground beef, look for an 85 or 90% fat
2 tbsp flour
1 4oz can diced green chiles, I like Hatch if you can find them.
1-2 chipotle chiles in adobo sauce, minced- my favorite brand is Embasa

1 28 oz can of diced tomatoes (for extra punch try 2 14 oz cans of fire roasted diced tomatoes)
2-3 40 oz cans of pinto beans, drained and rinsed (I like a lot of beans, but if you like it meatier do the 2 cans)
1/4 cup good quality chili powder
1 heaping tbsp oregano
2 tbsp ground cumin
2 tbsp Caldo De Pollo

1 - 2 cups of chicken broth
salt and pepper
Directions:
Use large pot and heat to medium high heat, add oil and onions. Toss in a pinch of salt, this helps to soften the onions. Stir onions for about 2-3 minutes, not going for color, just limpness, then turn the heat to medium and add garlic and jalepeno and saute for another 1-2 minutes (a good clue is when you smell the garlic). Add in the ground beef and turn the heat back up to med high to high heat, breaking up the ground beef as you stir it in. I like to use a wooden spatula , 
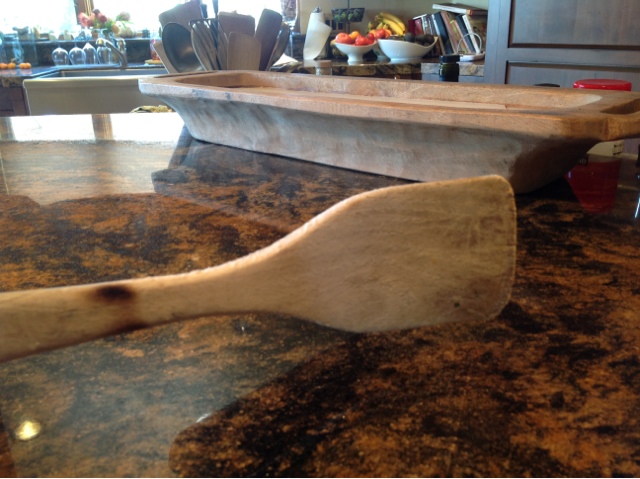
it is strong and has a nice flat surface to help break up the meat. Once the meat is cooked, sprinkle on the flour and stir it around so it it fully coated on the meat and has absorbs the oil. Once you see no more flour start adding your canned goods. The green chilies,chipotles (these are spicy so it is important to use just one or two and chop them very finely, don't want someone to bite into a big piece), tomatoes (juice and all) and pinto beans. Stir all well then add in the spices, chili powder, oregano, cumin and Caldo de Pollo. Again, stir well. At this point the mixture should have a nice brick red appearance.

I usually taste at this point for seasonings. Every flavor will get deeper as it cooks and so I don't  recommend adding any additional salt at this point, but I am not sure how to explain this but if it doesn't taste CHILI enough, or look red enough, I sometimes will add another tablespoons of chili powder. (Chili powder looses its kick as it sits on a shelf, so even if you bought it at the grocery store, you don't know how long it has been there and so you may need to make up for that lack of flavor by adding more) Add 1 cup of the chicken broth, stir and bring up to a simmer. Reserve the other cup for the process, if it seems after a half hour of cooking that it needs more liquid go ahead and add a half a cup then wait again another 15 minutes. (The cooking process allows the beans to break down a little and tomatoes to release some liquid so even when you add everthing to the pot it seems not very liquidy it is ok, it will be more so in that first 15-30 mins) Once it is simmering, lower the heat to low or med low. You want it to simmer lightly not boil with bubble breaking (if you do that you will get burning on the bottom of the chili). I like to set my lid on but not covering completely, just sort of offset to let the steam release. The thing about chili is the longer it cooks it seems to just get better and better so if you can do this early in the day and let it simmer for an hour or so that would be great, but it is important to stir the pot maybe every 10 - 15 minutes to make sure it isn't sticking to the bottom. When ready pour into bowls and add grated cheese, sour cream, fresh chopped onions and a squeeze of lime. Viola!


Now here are some variations you may want to do.

You can add green and/or red bell peppers to the onions

Add one or two roasted poblano chiles, chopped to the onions (add a little more spice and smokiness)

Substitute some of the pinto beans with Kidney beans

Before cooking the ground beef, use chorizo and cook it really well and then add the ground beef (just adds some more of that mexican spice)

Instead of flour, use Masa Harina (near the flour in the grocery store) It is what is used to make corn tortillas, so you add a little bit of the corn flavor.

Make a pot of macaroni noodles and toss together to make a Chili Mac dinner.

And last, if you really want to go decadent, instead of ground beef, use ribeye or filet mignon for the meat. Chop it into bite size pieces (it will shrink a bit in the cooking so not too little) and instead of tossing the flour in after adding the meat, toss the meat in the flour then add to the pan. You may need to add more oil to the pan before adding the meat if the onion mixture seems to dry. You just want to brown all the meat pieces you don't need to worry about cooking them thru cause they will cook in the pot with all the ingredients.

I wish I had a photo of the finished product to share, but honestly the taste is what matters the most!!! Enjoy!


Wednesday, April 17, 2013

Spicy Tomato Sauce with Chickpeas

Been a while since I have blogged, but my sister inspired me to get my butt in gear and begin again! With all this modern technology at my finger tips there is just no excuse why I shouldn't be sharing my love of cooking. So here is my first post back after an extended break!

I love eggs! I got chickens last year so I could be sure to have fresh eggs all the time. But for anyone that knows me, I am not one to do just normal food, I like to add interesting accents. In this case the interesting accent is a Spanish tomato sauce with chickpeas.I also am trying to add fiber into every meal I consume and do that with natural grains and beans in an attempt to steer away from bread, hence the chickpeas.


I love to make two over easy eggs in a nonstick pan, simple a dash of s&p.  I take a spoonful or two of the tomato mixture, place the cooked eggs on top and VIOLA breakfast.  The unctuousness of the egg yolk seeping into the tomato sauce is pure HEAVEN.  Very fulfilling and satisfying! 


SO here it how it goes.....


Spanish Tomato Sauce


I like to start the sauce earlier then the eggs so it has time to simmer and let all the flavors come together and develop. I begin with shallots and garlic
Heat a skillet over medium heat add about a tbsp of oil and add minced garlic and shallots and saute' till softened.
At this point I like to add my dried herbs to just get a little heat on them to bring out the fragrance.  For this I add 1/2 tsp of red pepper flakes and about 1 tbsp of Williams Sonoma Pizza Seasoning.  Is is full of delicious Italian herbs. 
You only want to leave this for a minute, MAYBE.  You just want them to smell.  At this point I add my canned tomatoes. I like to use Cento brands whole San Marzano tomatoes in their juice, I think the flavor is very full bodied. I use 2 cans and then I added for a little tang, about a cup of cut up sweet 100 tomatoes, yellow and red for some color pop. I think they give a nice acidity and fresh texture.  At this point I add salt and pepper and about 2 tbsp of Balsamic Vinegar and then let it simmer for about 1/2 hour or even longer if you like,  stirring occasionally breaking up the tomatoes more and more as you go.


This is the point where you add 2 16 oz cans of chickpeas (garbanzo beans) that have been drained and rinsed and about 1/4 chopped fresh basil.  Stir and let heat through and it is ready to go!  You might taste for final seasoning.  Sometimes if the tomatoes were too tangy, I might add a little sugar but usually the long cooking down process does the trick. 

A one cup serving is about 180 Calories and a WHOPPING 8 grams of fiber! Two whole eggs are about 144 calories so 324 calories for a very fulfilling breakfast AND you technically got fruit (tomatoes are a fruit) fiber and protein from your eggs, very well rounded meal ! I hope you enjoy!


Sunday, May 13, 2012

Sun Dried Tomato Spread


I have been asked for this recipe many times so I thought I would post it up here on my blog for all to see!

Sun Dried Tomato Spread

1-2lb jar(about 4 cups) of Bella Sun Luci tomtatoes (I get this jar at Costco, if you cant find this brand others should do)
6 cloves garlic
1 cup pitted Kalamata olive
1 tablespoon Taste No. 5 Umami Paste (if you cannot find, you can omit or add 2 or 3 anchovies)
1/2 cup of fresh basil leaves
pinch of salt
olive oil


Taste No. 5 Umami Paste
In a food processor combine all ingredients except for the olive oil and process till smooth. 
If it seems too thick add oil a tablespoon at a time till it is the the consistency you desire.


Thursday, August 4, 2011

Pig at its BEST!!

One of my husband's favorite dished is Pork Chile Verde.  I have worked on making the perfect one over the years and I think this one comes really close! I will say that although I didn't mention it in the recipe, I did use a Berkshire Boston Butt Roast from Lobels Butcher shop in New York, which just adds to the lusciousness of the dish, but it is still great no matter what.  The other items I will mention, if you can have that rub on it overnight, it just adds to the flavor and you can add different chiles or sub out the poblanos for anaheims or just eliminate them if you like. I would love it if you would post your comments to let me know if you had success and/or if you liked it!!  Thanks and enjoy!!


Pork Chile Verde

One Pork Boston Butt roast (about 6 pounds) also known as shoulder
Rub – recipe to follow
½ cup flour blended with a tbsp. of both salt and pepper
Oil (preferably avocado, but canola will work)
1 onion, diced
One head of garlic, all cloves diced
3 jalapenos, diced

10-12 tomatillos, husked and rinsed
1 onion sliced
2 poblano chiles
2-28 oz cans roasted green chiles (you can do it yourself, but this is easier and I like Hatch chiles which are available at Costco)
1 bunch of cilantro
4 cups chicken stock
2 tbsp oregano
2 bay leaves
Juice of limes (1-4)

Rub-
3 tbsp. ground cumin
3 tbsp chili powder
2 tbsp salt (I like kosher)
1 tbsp brown sugar
1 tbsp garlic powder
1 tbsp onion powder
1 tsp ground pepper
1 tsp cayenne

Directions-
Get your butt roast and cover with the rub, making certain the rub is really rubbed into the meat.  Let sit in the refrigerator uncovered, preferably overnight, but try to do it for at least 4 hours.  Take the meat out and cut into bite sized chunks. Toss chunks into the flour mixture, fully covering but shaking off excess. Using a large dutch oven, coat the bottom of the pan with oil and heat to screaming hot! In batches, brown the pork on all sides, careful not to crowd in pan (don’t want to steam them).  Place on baking sheet till all the pork pieces are browned, add oil as needed to keep a nice coat on the bottom.  Bring the heat down to medium and add diced onions, garlic and jalapenos, sautĆ© till soft, not trying for color.  While they are sautĆ©ing, place on baking sheet the tomatillos, sliced onions and poblanos and roast in oven at 450 for around 10 – 15 minutes, until they are all soft. (Can be done ahead of time) Once done place them and all the juices in the blender along with the green chiles and cilantro and blend till smooth (may have to do in batches and add chicken stock as needed to keep the blade moving. Also remember that it is hot liquid so be sure to cover the lid with a dish towel to prevent it from exploding)

Lower oven temp to 250. Place pork back into the dutch oven, add in blended chile mixture and add enough chicken stock to make sure all the meat is covered with liquid.  Add oregano and bay leaves, bring to simmer on stove top.  Cover and place in oven for 2 ½ - 3 hours until meat is tender and falls apart.  Check every 45 minutes or so to make sure the liquid is still covering the meat at least half way.  When done, use fresh lime juice for a little acidic kick and it all depends on your taste buds.  Add salt and pepper to taste. 
Serve with Queso Fresco, warm flour tortillas, green Tabasco, chopped onions, crema, and fresh lime quarters.  WOW yummy!!

Friday, March 12, 2010

Meyer Lemons, Liquid Sunshine!

What is a Meyer Lemon and what makes it so special?  Well from a technical standpoint, a Meyer is thought to be a cross between a ture lemon and a sweet orange.  From a culinary standpoint, it is quiet unique and special.  You get the tang and acidity of a lemon but not with the same punch as a typical lemon, so something you would typically use a lemon for, you can sub in a Meyer lemon and get a terrific brightness, but with a sweetness too.  I have spent alot of time experimenting with this fruit to devise ways to highlight its unique qualities.  Here are some things to try should you come across this hard to find fruit!

Meyer Lemon Simple Syrup
1 cup sugar
1/2 cup water
1/2 Meyer Lemon juice
zest from 1 or 2 lemons
Heat over med high heat till sugar is disolved. Strain into a container and store in the fridge.  Use to make a martini, lemonade, or sweeten your tea.

Meyer Lemon Herb Vinagrette
1 Shallot, minced
1 tblsp Dijon Mustard
1 tblsp Honey
1/4 cup Meyer lemon juice
zest from 1-2 Meyer lemons
1 tblsp finely chopped, each of Basil, Rosemary, Oregano, and Flat Leaf Italian Parsely (any combo of those would work)
1/2 -1 cup oil, I prefer avocado oil but canola or Olive oil will work too
Salt & Pepper

In a bowl, whisk together the shallot, mustard, honey and lemon juice.  Let stand for about 5 minutes. I do this to allow the shallots to mellow out.  Now add in the zest and finely chopped herbs, blend well.  Begin to whisk and slowly add in 1/2 cup of oil till blended and emulsified.  Check for taste and consitancy.  Everyone likes their salad dressings a bit different, I am usually fine right here since it makes for a lighter calorie choice, but at this point you can also adjust your sweet/sour levels.  Sometimes your Meyers will be sweeter then others so this is the time to check, adjust, salt and pepper, a pinch of each and serve or store in a jar in the fridge. The obvious use is for salad, but try this, roast potatoes in the oven and when they are nice and crispy and ready to take out, pour some of the vinagrette over them, about 1/4 cup and toss well, put back in the over for about 5 minutes to heat thru, and serve.  DELICIOUS!

Tangy Garbanzo Bean Salad AKA Fiber Bomb Salad
Salad
3-14 oz cans Garbanzo Beans drained and rinsed
5-6 garlic cloves, minced
1 jalepeno pepper,seeded and minced
1 each yellow and red bell pepper, seeded and chopped
1 bunch green onions, chopped
1 bunch fresh cilantro, chopped
Zest from 1 or 2 Meyer lemons and one lime
Dressing
1 shallot, minced
1 tblsp Dijon Mustard
1 tblsp honey
1 tblsp Cumin
1/4 Meyer lemon juice
juice of one lime
1/2 cup vegetable oil, (again I prefer avocado oil)
Salt and pepper to taste

Combine all the salad ingredients.  Combine all the dressing ingredients except for oil then slowly whisk in the oil.  Add the dressing to the salad and toss well.  Referigerate for about 1 hour to let all the flavors marry. 
OPTIONS- Sometimes I add one or all of the following ingredients.
1-28 oz  can of green beans.
1 fennel bulb, diced
3 chopped roma tomatoes
1 lb package of whole grain pasta, cooked

Make it your own!  It is loaded with fiber and vitamins and it feels so fresh and bright with all the citrus, it is a perfect addtion to any meal!

Well I hope that you try some of these recipes, you can also sub in a regular lemon in any of these applications, but you will probably need more sugar or honey to mellow it out.  Just remember these lemon tips.
  • Anytime a recipe calls for vinegar, sub in lemon juice and taste the difference
  • When making chicken soup, add a squeeze of lemon juice to add brightness without the sourness, (TRY IT YOU WILL BE SURPRISED)
  • Clean your copper pots. Sprinkle with salt and then squeeze with the juice. Clean gently and you will be amazed
  • Clean your cutting boards.  Lemon juice is a natural antibactierial agent. I sprinkle some salt on my board and take a cut half of lemon and rub my board.  The salt just makes for an abrasive to get into the nooks and crannies.  Rinse your board and if wood, oil lightly to keep the wood moist.
Remember when life gives you lemons, make MEYER LEMONADE!!

PS Meyer lemons will be available on our company website soon.  Visit us at http://www.spfarminc.com/!


Wednesday, February 24, 2010

Seasonal Fuel

I am a firm believer in seasonal and fresh ingredients, the challenge is to find the ones that are truly fresh.  Many of the items in your produce section may look pretty and shiny, and yet a bite or cut into it and you will see that this is not the case.  Many of our produce items have been specifically developed to be as resistant to the elements as possible, that way they can handle the cold storage for months at a time they might go through.  An apple you buy today, may have sat in a cold storage room for months.  I understand the economics of this, but the basic truth is food is the fuel our bodies require in order to live.  The way we create unique dishes, exciting tastes and eye pleasing plates, is the icing on the cake.  If we can for a minute just deal with the stripped down version of this and the fact that it is fuel for us, it will be clear that fresh and seasonal is in everyone's best interest. Once a fruit or vegetable is removed from its life source, its vitamin punch begins to degrade and of course the quality begins to degrade as well. If we are looking for the best case of fuel for us, then we would want to eat something that gives us the most nutrition as possible.  Use your computer to find out what fruits and veggies are being harvested in your local area and search them out, or ask your produce manager in the grocery store, although I am not certain you will get the help you really want because their job is to move product, not tell you that the apples you just put in your cart are a year old.

Now if you are lucky to find something fresh, but you can't use it right away, then, if this is a viable option, you should blanch it and freeze.  For instance, every year we plant English peas, a lot of them.  I harvest them about 3 or 4 times during the early spring and if I ate them all while they were fresh picked, I would turn into a giant pea.  What I do is I pick, shell, heat water to boiling and add a hand full of salt.  Throw the shelled peas into the boiling water, bring back to a boil and within a minute or two drain them and shock them in a bowl of ice water. Get a sheet tray and lightly spray with cooking spray and put the drained, cold peas on the sheet tray in a single layer.  Put it in the freezer overnight then the next day, put the frozen peas in a ziplock bag and throughout the year, you will have fresh peas.  AND the bonus point part of this is, the blanching process, then freezing helps to keep the enzymes from breaking down and allows it to keep more of its nutrients in tact. This is also a great thing to know when shopping for unseasonable fruit or veggies.  Buying frozen is typically a better way to be assured that the nutrients have been preserved.  Obviously not all items can be frozen, so be sure to not overbuy. It may mean better planning and more trips to the market, but your body will thank you for it!!